This is the first in a four-part series about how and why we cup coffee at Mill City.
Out of all of the protocols and practices around roasting, cupping seems to be one of the most rigid. There’s a good reason for this: consistency at the cupping table gives you much more accurate feedback about the quality of your green coffee or roast. We get a lot of questions about cupping, so I wanted to break it down from set-up to execution. In these posts, I'll share some of the ways we make cupping more efficient, repeatable, and precise in our roastery. These are tips our team has picked up along the way of cupping with other roasters and green buyers at roasteries and QC labs across the country.
PART ONE: SETTING UP YOUR CUPPING
If you’re following the SCA Protocols for cupping a sample roast, you’ve already let your coffee rest for at least 8 hours and no more than 24 hours. If this is a production cupping, meaning you’re simply cupping coffees you’ve roasted for customers, you might have several days worth of roasts on the table. Either way, make sure your coffee is not directly off-roast and that it’s had at least 8 hours to rest. Try not to cup coffee that’s more than 2-weeks post-roast, as you’ll start to lose some strength of flavor at that point.
We keep several cases of the same cupping bowls on hand. This way, we always have clean cups and we’re not waiting for something to be washed or dried in order to begin our cupping. Don’t weigh coffee into wet cups, even a few drops of moisture will create issues in grinding and brewing.

CUP SELECTION & DOSE
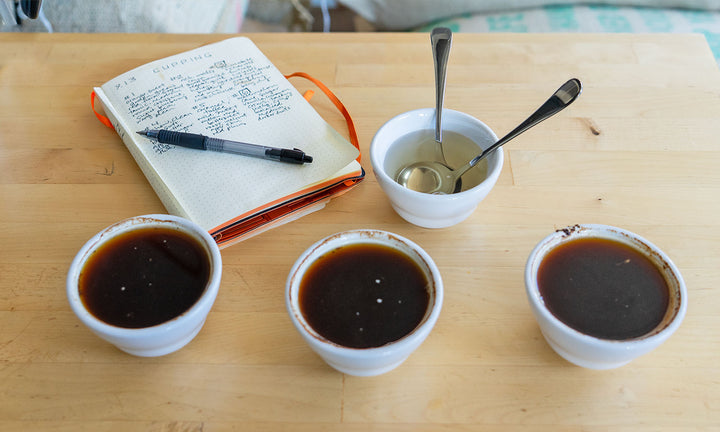
If you’re deciding on whether you’re going to purchase a coffee, you may choose to cup “a full set”. For most roasters and green buyers, this means you’ll weigh out 5 cups of the same coffee so you have multiple cups to evaluate. For production or QC cuppings 2-3 cups is adequate to get a good picture of what the coffee tastes like. It’s hard to get a good impression of a coffee if you only have one cup, especially if there’s a chance the coffee may contain a defect. Tasting multiple cups of the same coffee gives you a better representative impression of that bean.
We begin our cupping set-up by weighing whole bean coffee into each individual cup using a standard ratio. Our cups can hold about 7oz, or about 200mL, of water. Based on this volume, we use 11g of coffee which gives us a 1:18 ratio. It’s important to weigh out 11g doses into each individual cup and then grind each cup individually because of the risk of defects. If we were to grind a large amount of coffee and then distribute the grounds into multiple cups, we could spread one defective bean out across all of the cups. This would give us a much more negative impression of the coffee than if the defect were isolated in one cup. A defect is never good to encounter, but if it’s mild and only appears in one sample, it’s less of an issue than if all of the coffees in a set tasted “off”.
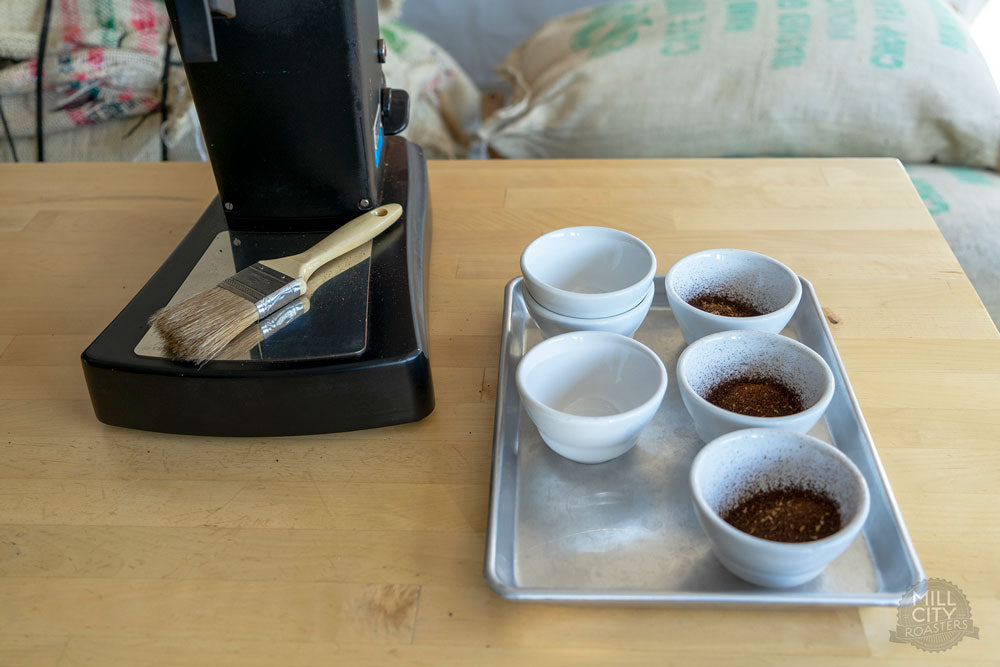
We also weigh out an extra cup for each set to use as our “purge” or “rinse” dose. This will pass through the grinder prior to brewing so that the burrs don’t have any residue from the previous coffee on them. Avoiding cross-contamination helps us evaluate effectively.

GRINDING TIPS
For easier set-up and clean-up, invest in a few lightweight trays like the ones you’d see at a fast food restaurant. We use metal quarter-sheet baking trays. Trays allow us to line up multiple cups or keep full sets grouped together, and they’re easier to carry back and forth to the grinder and the sink after you’re done. Trays allow us to work smarter, not harder.
Grinding for a cupping is easiest if you have a commercial grinder with a top-loading hopper. After grinding your “rinse” dose and discarding it, you have an empty cup in your hand. Place that cup underneath the dosing funnel and pour a pre-weighed dose of coffee into the hopper with the motor on. After you catch the grounds with the cup in your hand, knock the doser a few times (be consistent with this as well, we will knock twice for every dose). Next, move the empty cup to your other hand and place it beneath the dosing funnel, grab another dose and pour it into the hopper. With practice, this fluid motion allows you to grind several samples quickly with minimal wasted movements.
BEFORE YOU BEGIN
Since the standard for a “formal cupping” states that the coffee should be ground no more than 15 minutes before evaluation, it’s helpful to be able to grind quickly. After cups are lined up back on the cupping table and arranged in the correct order, you can begin your assessment. If you need to wait for some reason, you can use a coaster or index card as a lid for the cupping bowl. This helps keep some of those volatile fragrance compounds in the bowl and will give you a stronger impression on your first fragrance pass.
A bit of cupping etiquette: when cupping with others, pick one direction to move around the table and don’t change it. This way, you’re not running into each other and people can move quickly from set to set. We rotate counter-clockwise around the cupping table.
Don’t linger too long on any coffee, this slows down the process for others but can also make you overthink your impression. In general, your first instinct is the right one. If you spend too much time with one coffee, you may second guess your sensory descriptors. If you can’t describe what you’re smelling or tasting after a few moments, leave the note blank and move on to the next. You may get more information on your second pass.
Also, try to avoid reaching into a set where someone else is smelling or tasting. Pay attention to the coffee in front of you, and let others do the same.
Click here to read part two of this series, which covers the fragrance and aroma steps of cupping.