

This is the fourth in an ongoing series on what tools we keep in the Mill City roastery for efficiency, quality control, and more. Click here for Part 1, Part 2 , or Part 3.
In our last roastery supply post, we covered high-ticket items in our space that help support us in our daily efforts to maintain quality control. We explain how these tools are used in our roastery and across the industry. Depending on your goals, you may find it necessary to invest in such supplies; if not, we hope to provide direction and a jumping-off point so you can easily make these decisions in the future.

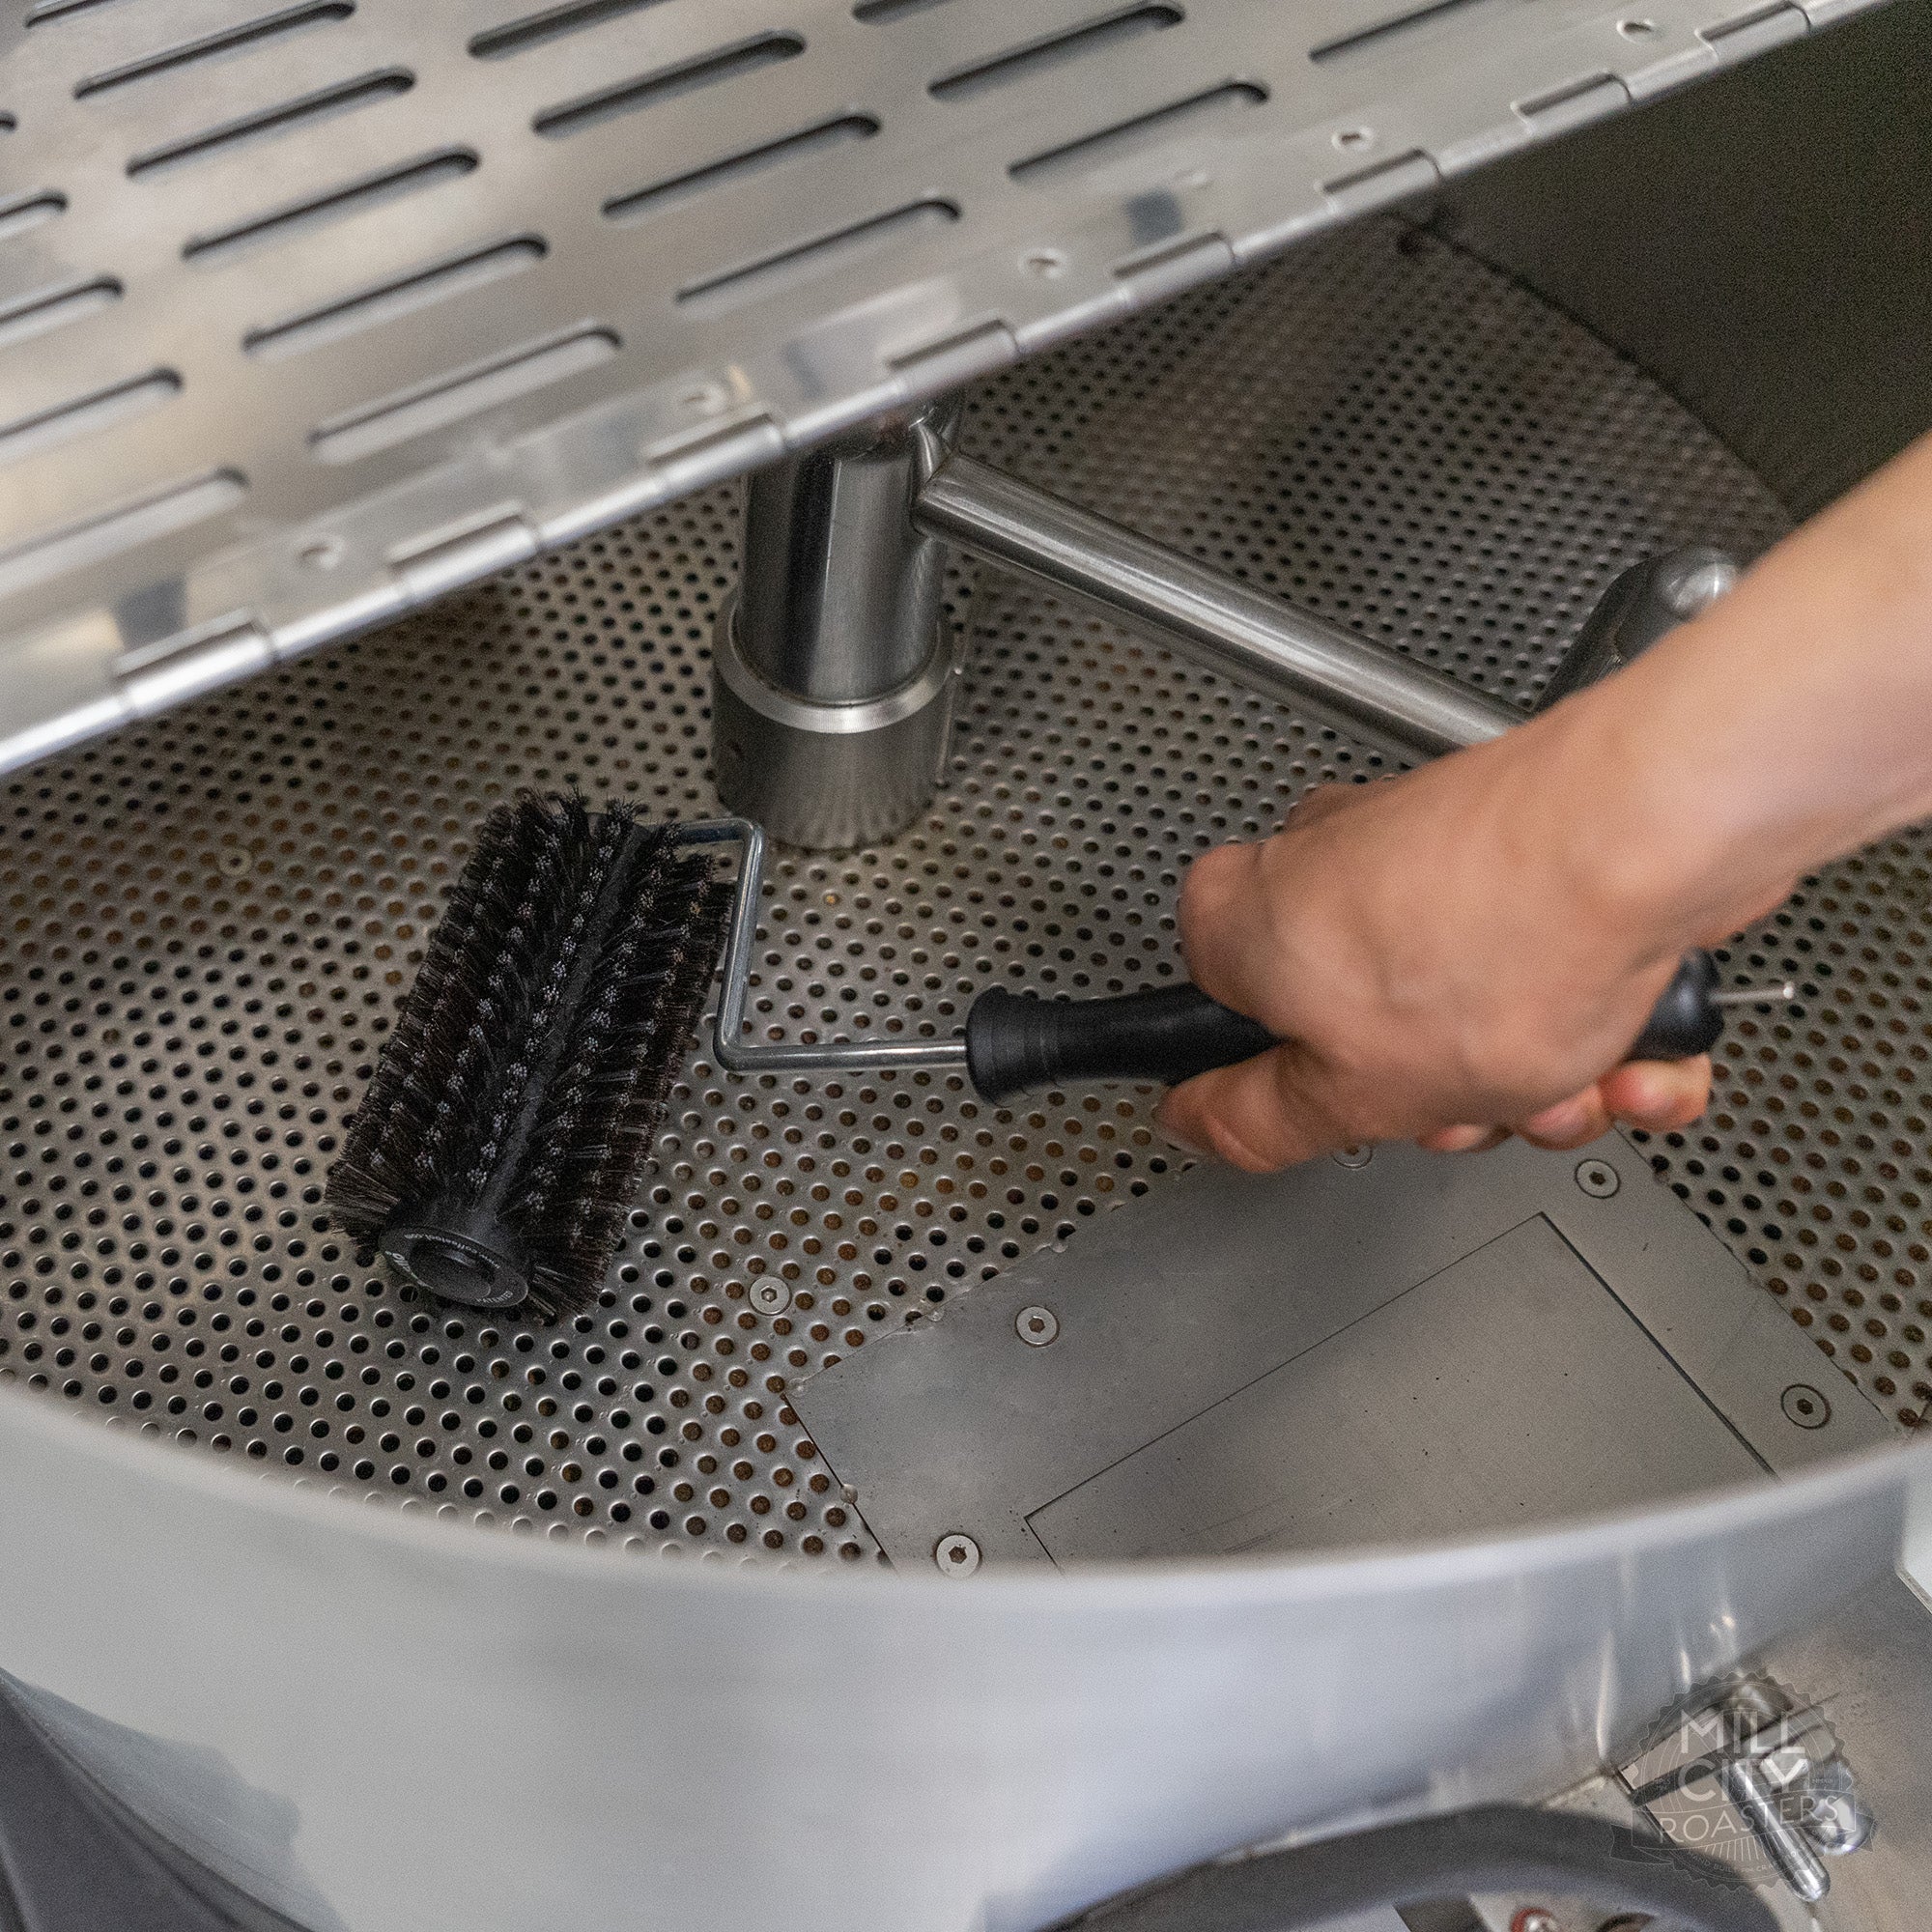
Brushes, Bristles, and Scrapers
As you spend more time on your roaster, you’ll get an idea of the best time to clean it. When you’re ready, you’ll want to be sure to have the right tools. We like to use a variety of brushes, bristles, and scrapers to remove the coffee residue that builds up on production roast days.
Nylon brushes are great for easy cleaning of light buildup, but be sure to buy sizes that correlate with the diameter of your venting. For harder buildup, go for more abrasive brushes to tackle tougher spots or use paint or stucco scrapers. Wall scrapers help scuff away any gunk from flat surfaces or can be used to score walls of venting and chaff cans if there’s lots of buildups.
The cooling tray can be difficult to clean, and many find themselves spending too much time trying to unclog each tiny hole one by one. Bryant suggests using the Pallo Rollster; a cooling tray cleaning tool. Its bristles are evenly spread out to pierce each vent hole with a larger rubber poker on the side for heavier blockages.
Mechanics Tool Set
We keep a collection of hex keys, socket sets, and general mechanical tools on hand in the roastery. On cleaning days, we’ll reach for these to break down the roaster and get into tough spots.
Hex keys will be used to access areas under the roaster, remove venting components, and even open up your burner door. Sockets and screwdrivers will be your friend when you are getting into your fan housing to clean your impellers.
From our 3KG machine and larger, we recommend keeping a gear puller (available from our Support Team) which helps with stubborn, hard-to-remove impellers. It’s okay, it happens. This can make the job of removing it very easy.
Bearing Grease and Spray
Make sure your roaster is a well-oiled machine. This means having Biolube in a tube and spray on hand.
The tube grease is a high-temperature limit grease that you will need to apply to the front and rear bearings of the drum to maintain lubrication. If you hear squeaking from either side of your machine when starting up for the day, it’s most likely time to grease.
Make sure the chain on the rear of your machine (if applicable) is well lubricated, like a bike chain. It should have a satin-like sheen and appear a little glossy. It shouldn’t be wet and dripping. Maintain this chain with the spray lube, which has a lower temperature limit. Since the rear of the machine is cooler than the front, the lower temperature limit on the spray lube works there.
Shop Vacuum and Masks
A shop vacuum for cleaning days is a must. We’ll use our vacuum to get the chaff out of the collector and from other areas of the roasters. Anywhere from a 9 to 12-gallon size should get the job done, but you can size down for smaller roasters.
We wear a mask whenever we’re moving around greens or scrubbing down the venting. This is because, over time, we can develop allergies to green coffee dust. Coffee residue also contains a high amount of carbon. As we’re scrubbing the buildup from our venting system, it can waft up and without a mask, we breathe that in. Long-term, this can cause negative symptoms to appear.
When you’re outfitting your roastery, there are an endless amount of cleaning tools to throw in your toolkit. We suggest starting with the basics, and scaling to heavier-duty items when production cleaning calls for it. Unfortunately, there’s no “roastery cleaning supply” aisle at the local hardware store (yet). The tools you’ll need will likely be collected from the plumbing, painting, and small tools section of your favorite Menards, Home Depot, or the like. Many roasters will slowly grow this collection of tools over time until they have their customized cleaning kit.
If you have more questions about how we use these in our space, feel free to reach out via email at hello@millcityroasters.com or call our office (612) 886-2089.
Click here to read part 5 where we continue to deep dive into the right tools to outfit your roastery.

Comment
Good starting point to equip a new roasterie